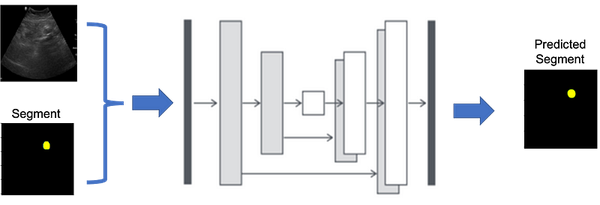
YOLOv8 Segmentation on Custom Dataset (Tutorial)
YOLOv8 is an amazing segmentation model, its easy to train test and deploy. In this tutorial we will learn how to use YOLOv8 on custom dataset
YOLOv8 is an amazing segmentation model; its easy to train, test and deploy. In this tutorial, we will learn how to use YOLOv8 on the custom dataset. But before that, I would like to tell you why should you use YOLOv8 when there are other excellent segmentation models? Let’s start with my story.
I was working on a project related to medical image segmentation when my collaborator dropped a bombshell by saying that we had only 600 images and masks from 175 patients. In medical imaging, it’s a common problem because clinicians/doctors are the busiest people, and they have numerous duties. However, he assured me that once the model is trained (and fine-tuned), we will have images and masks from an additional 300+ patients as an Additional test set to evaluate our model.
I began by dividing the 50 patients into training, testing, and validation datasets using an 80:10:10 ratio. For the model, I started with UNet and its variants (ResUNet, Attention UNet, Res-Attention UNet). These models performed excellently on the training, test, and validation datasets but failed badly on the additional test set. Then I thought, ‘Let’s try YOLOv8; if it works, it will be great, and if not, then it will be a fun learning experience.’ After a few hours, it worked, and to my surprise, it far exceeded my expectations on the Additional test set. I cannot reveal by how much because the paper is still under review, but I would love to share how I adapted this to a custom dataset so that you can save hours of work. Let’s begin with the plan of attack.
Plan of Attack
Here are the topics we will learn:
1. YOLOv8 Short Introduction
2. Install the library.
3. Dataset Preparation.
4. Training Preparation
5. Training model
6. Results
YOLOv8 Short Introduction
YOLOv8 is the newest version of the YOLO series for real-time object detection, developed by Ultralytics. It enhances accuracy and speed by introducing modifications like spatial attention and feature fusion [1]. The architecture combines a modified CSPDarknet53 backbone with an advanced head for processing[2]. These advancements make YOLOv8 a state-of-the-art choice for various computer vision tasks[3].
Install the Library.
Here are the options to install the library.
# Install the ultralytics package using conda
conda install -c conda-forge ultralytics

or

# Install the ultralytics package from PyPI
pip install ultralytics
Dataset Preparation
The dataset requires two-step process:
Step 1: Please arrange your dataset (images and masks) in the following structure: Train test and validation (val) ratio is ideally 80:10:10. Dataset folder arrangement:
dataset
|
|---train
|   |-- images
|   |-- labels
|
|---Val
|   |-- images
|   |-- labels
|
|---test
|   |-- images
|   |-- labels
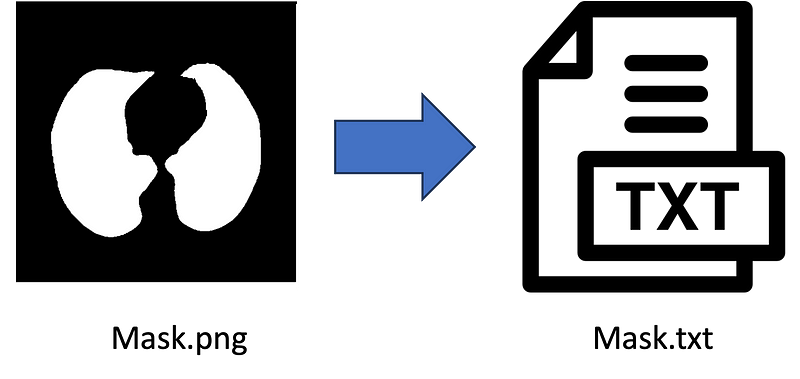
Step 2: second step is to convert .png (or any type) masks (labels) to .txt files in all 3 label folders. Below is the python code for converting labels (.png, .jpg) to .txt file. (you can also do this on )
import numpy as np
from PIL import Image

import numpy as np
from PIL import Image
from pathlib import Path

def create_label(image_path, label_path):
    # Load the image from the given path and convert it to a NumPy array
    mask = np.asarray(Image.open(image_path))

    # Find the coordinates of non-zero (i.e., not black) pixels in the mask's first channel (assumed to be red)
    rows, cols = np.nonzero(mask[:, :, 0])

    # If no non-zero pixels are found in the mask, return early as there's nothing to label
    if len(rows) == 0:
        return  # Optionally, handle the case of no non-zero pixels as needed

    # Calculate the normalized coordinates by dividing by the respective dimensions of the image
    # This is done to ensure that the coordinates are relative (between 0 and 1) rather than absolute
    normalized_coords = [(col / mask.shape[1], row / mask.shape[0]) for row, col in zip(rows, cols)]

    # Construct a string representing the label data
    # The format starts with '0' (which might represent a class id or similar) followed by pairs of normalized coordinates
    label_line = '0 ' + ' '.join([f'{cord[0]} {cord[1]}' for cord in normalized_coords])

    # Ensure that the directory for the label_path exists, create it if not
    Path(label_path).parent.mkdir(parents=True, exist_ok=True)

    # Open the label file in write mode and write the label_line to it
    with open(label_path, 'w') as f:
        f.write(label_line)


import os

for x in ['train', 'val', 'test']:
    images_dir_path = Path(f'datasets/{x}/labels')
    for img_path in images_dir_path.iterdir():
        if img_path.is_file() and img_path.suffix.lower() in ['.jpg', '.jpeg', '.png', '.bmp']:
            label_path = img_path.parent.parent / 'labels_' / f'{img_path.stem}.txt'
            label_line = create_label(img_path, label_path)
        else:
            print(f"Skipping non-image file: {img_path}")
Please note: After running the above code, please don’t forget to delete the label (masks) images from label folders.
Training Preparation
Create ‘data.yaml’ file for training. Just run the below code in Python, and it will create ‘data.yaml’ file for YOLOv8.
yaml_content = f'''
train: train/images
val: val/images
test: test/images

names: ['object']
# Hyperparameters ------------------------------------------------------------------------------------------------------
# lr0: 0.01  # initial learning rate (i.e. SGD=1E-2, Adam=1E-3)
# lrf: 0.01  # final learning rate (lr0 * lrf)
# momentum: 0.937  # SGD momentum/Adam beta1
# weight_decay: 0.0005  # optimizer weight decay 5e-4
# warmup_epochs: 3.0  # warmup epochs (fractions ok)
# warmup_momentum: 0.8  # warmup initial momentum
# warmup_bias_lr: 0.1  # warmup initial bias lr
# box: 7.5  # box loss gain
# cls: 0.5  # cls loss gain (scale with pixels)
# dfl: 1.5  # dfl loss gain
# pose: 12.0  # pose loss gain
# kobj: 1.0  # keypoint obj loss gain
# label_smoothing: 0.0  # label smoothing (fraction)
# nbs: 64  # nominal batch size
# hsv_h: 0.015  # image HSV-Hue augmentation (fraction)
# hsv_s: 0.7  # image HSV-Saturation augmentation (fraction)
# hsv_v: 0.4  # image HSV-Value augmentation (fraction)
degrees: 0.5  # image rotation (+/- deg)
translate: 0.1  # image translation (+/- fraction)
scale: 0.2  # image scale (+/- gain)
shear: 0.2  # image shear (+/- deg) from -0.5 to 0.5
perspective: 0.1  # image perspective (+/- fraction), range 0-0.001
flipud: 0.7  # image flip up-down (probability)
fliplr: 0.5  # image flip left-right (probability)
mosaic: 0.8  # image mosaic (probability)
mixup: 0.1  # image mixup (probability)
# copy_paste: 0.0  # segment copy-paste (probability)
    '''

with Path('data.yaml').open('w') as f:
    f.write(yaml_content)
Training model
Once data is prepared, rest is very easy, just run the lines below.
import matplotlib.pyplot as plt
from ultralytics import YOLO

model = YOLO("yolov8n-seg.pt")

results = model.train(
        batch=8,
        device="cpu",
        data="data.yaml",
        epochs=100,
        imgsz=255)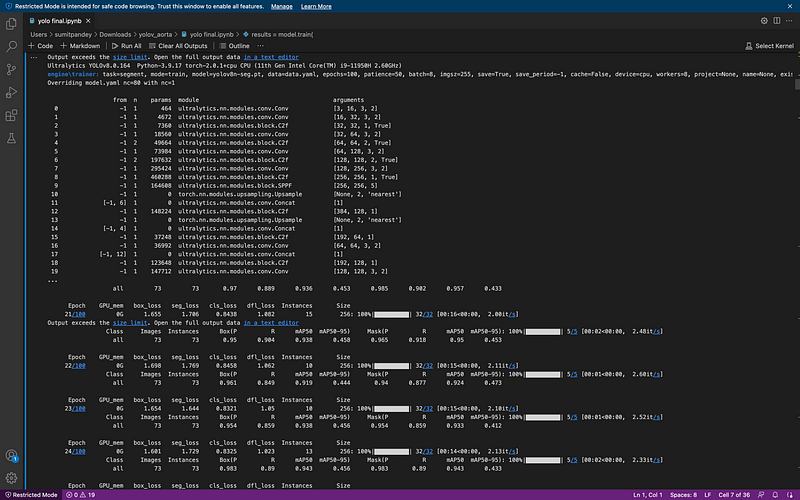
Congratulations, you did it. Now you will see there is a ‘runs’ folder you inside that folder, you will find all the training matrices and plots.
Results
ok let’s check the results on the test data:
model = YOLO("runs/segment/train13/weights/best.pt") # load the model

file = glob.glob('datasets/test/images/*') # let's get the images
Now lets run the code over the images.
# lets run the model over every image
for i in range(len(file)):
    result = model(file[i], save=True, save_txt=True)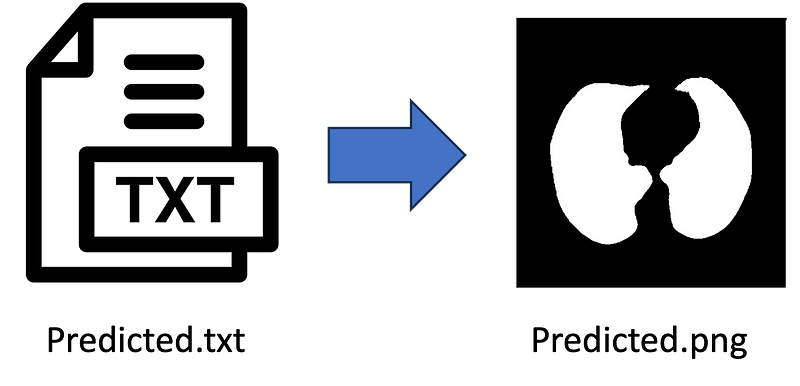
import numpy as np
import cv2

def convert_label_to_image(label_path, image_path):
    # Read the .txt label file
    with open(label_path, 'r') as f:
        label_line = f.readline()

    # Parse the label line to extract the normalized coordinates
    coords = label_line.strip().split()[1:]  # Remove the class label (assuming it's always 0)

    # Convert normalized coordinates to pixel coordinates
    width, height = 256, 256  # Set the dimensions of the output image
    coordinates = [(float(coords[i]) * width, float(coords[i+1]) * height) for i in range(0, len(coords), 2)]
    coordinates = np.array(coordinates, dtype=np.int32)

    # Create a blank image
    image = np.zeros((height, width, 3), dtype=np.uint8)

    # Draw the polygon using the coordinates
    cv2.fillPoly(image, [coordinates], (255, 255, 255))  # Fill the polygon with white color
    print(image.shape)
    # Save the image
    cv2.imwrite(image_path, image)
    print("Image saved successfully.")

# Example usage
label_path = 'runs/segment/predict4/val_labels/img_105.txt'
image_path = 'runs/segment/predict4/val_labels/img_105.jpg'
convert_label_to_image(label_path, image_path)


file = glob.glob('runs/segment/predict11/labels/*.txt')
for i in range(len(file)):
    label_path = file[i]
    image_path = file[i][:-3]+'jpg'
    convert_label_to_image(label_path, image_path)
DONE 😃
References
1. Roboflow Blog: [What is YOLOv8? The Ultimate Guide](https://blog.roboflow.com/yolov8/).
2. Labellerr: [Understanding YOLOv8 Architecture, Applications & Features](https://www.labellerr.com/blog/understanding-yolov8-architecture-applications-features).
3. Ultralytics YOLOv8 Docs: [YOLOv8 Overview](https://docs.ultralytics.com/en/stable/models/yolov8.html).


